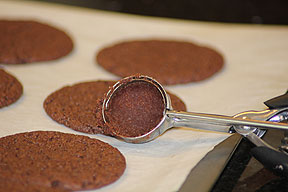
Yield: 24 cookies
Big NOTE!: These are rich but so good. Great for this holiday season. Also PLEASE remember to lower the temperature of the oven by 25 degrees if you are using a non-stick dark pan!!!! The bottoms will burn by the time the rest of the cookie bakes if you don't. These are yummy and worth the overnight or 6 hour wait for the dough to cool!
INGREDIENTS
3/4 cup all-purpose flour
1 tsp baking powder
1/2 tsp salt
16 oz dark chocolate (60-72% cacao), coarsely chopped
10 Tbsp unsalted butter, cut into 1" pieces
6 large eggs
1 1/4 cups granulated sugar
1 cup firmly packed light brown sugar
1 Tbsp pure vanilla extract
1 cup (6 oz) semisweet chocolate chips
1 cup (6 oz) white chocolate chips
1 cup (6 oz) dried cherries
Sift the flour, baking powder, and salt together into a medium bowl & set aside.
In a large nonreactive metal bowl, combine the dark chocolate and butter. Set the bowl over a saucepan of simmering water and cook, stirring with a rubber spatula, until the chocolate and butter are completely melted and the mixture is smooth. Set aside to cool.
In the bowl of an electric mixer fitted with the whisk attachment, beat the eggs and sugars on high speed until the mixture is pale and thick, about 5 minutes.
Add the cooled chocolate mixture and the vanilla and beat until just combined. Scrape down the bowl and beat again for 10 seconds.
Add the flour mixture and mix on low until just combined, about 10 seconds. Do not over mix.
Using a spatula or wooden spoon, fold in the chocolate chips, white chocolate chips, and dried cherries. The dough will look very loose, but it will harden in the refrigerator. Refrigerate for 6 hours or overnight.
Preheat the oven to 375 degrees F (or 350 degrees F if using dark or nonstick pans). Line two baking sheets with parchment paper.
Drop the dough by rounded tablespoons onto the prepared baking sheets, about 1 inch apart. Bake for 10-12 minutes, rotating the pans halfway through the baking time, until the tops of the cookies are set and begin to show a few cracks. Remove from the oven and let cool slightly before removing from the pans and serving.
The cookies can be stored in an airtight container for up to 3 days.
Showing posts with label cookies. Show all posts
Monday, November 28, 2011
Monday, September 26, 2011
Pumpkin Whoopie Pies - Come on Fall!
Matt & Renato couldn't have said it better "try as we might, we were never huge fans of the traditional whoopie pie." Their version below was listed as one of the top 100 tastes of 2007 by Time Out New York. Their whoopie pie would satisfy any midnight craving, with its soft, cake like cookie and chilled cream cheese filling.
It was the first day of Fall today. This is my favorite time of year and seeing all of the pumpkins displayed at our local farms put me in the mood to make these babies! So here they are and maybe, just maybe, they will inspire nature to bring on the typical fall weather for us!
These were easy and fun to do with my 6 year old daughter. A word of warning: don't assume you have enough of the spices on hand...I usually have small containers and they use take tablespoons rather than teaspoons here. Quick and painless to make so go ahead....try them! You won't be sorry...ok, maybe your hips will be, but your taste buds won't! Ha!
FOR THE PUMPKIN WHOOPIE COOKIES
3 cups all-purpose flour
1 tsp salt
1 tsp baking powder
1 tsp baking soda
2 Tbs cinnamon
1 Tbs ginger
1 Tbs cloves
2 cups firmly packed dark brown sugar
1 cup vegetable oil
3 cups chilled pumpkin puree
2 large eggs
1 tsp pure vanilla extract (I used vanilla paste since it was being baked)
FOR THE CREAM CHEESE FILLING
3 cups confectioner's sugar
1/2 cup (1 stick) unsalted butter, softened
8 oz cream cheese, softened
1 tsp pure vanilla extract
MAKE THE PUMPKIN WHOOPIE COOKIES
Preheat the oven to 350 degrees F. Line two baking sheets with parchment paper.
In a large bowl, whisk the flour, salt, baking powder, baking soda, cinnamon, ginger, and cloves together and set aside.In a separate bowl, whisk the brown sugar and oil together until combined. Add the pumpkin puree and whisk to combine thoroughly. Add the eggs and vanilla and whisk until combined.
Sprinkle the flour mixture over the pumpkin mixture and whisk until combined.
Use a small ice cream scoop (I used a cookie dough scoop) with a release mechanism to drop heaping tablespoons of the dough onto the prepared baking sheets, about 1 inch apart. Bake for 10-12 minutes, until the cookies are just starting to crack on top and a toothpick inserted into the center of a cookie comes out clean. Remove from the oven and let the cookies cool completely on the pan while you make the filling.
In the bowl of an electric mixer fitted with the paddle attachment, beat the butter until it is completely smooth, with no visible lumps. Add the cream cheese and beat until combined.
Add the confectioners' sugar and vanilla and beat until smooth. Be careful not to over beat the filling, or it will lose structure. (The filling can be made 1 day ahead. Cover the bowl tightly and put it in the refrigerator. Let the filling soften at room temperature before using).
ASSEMBLE THE WHOOPIE PIES
Turn half of the cooled cookies upside down (flat side facing up).
Use an ice cream scoop or a tablespoon to drop a large dollop of filling onto the flat side of the cookie. Place another cookie, flat side down, on top of the filling. Press down slightly so that the filling spreads to the edges of the cookie. Repeat until all the cookies are used. Put the whoopie pies in the refrigerator for about 30 minutes to firm up before serving.
The whoopie pies will keep for up to 3 days, on a parchment-lined baking sheet covered with plastic wrap, in the refrigerator.
Labels:
cake,
cookies,
cream cheese,
frosting,
pie,
pumpkin,
spice,
whoopie,
whoopie pie
Sunday, August 14, 2011
Chocolate Chunkers - Caution: cookies taste yummier than they appear!
Another Dorie Greenspan recipe I had to try. Her description of these were "truly fabulous". Though these look kind of ho hum they are far from. In my photos you can only see the white chocolate chips and maybe a peanut here and there, there is also mixed plump raisins, semi sweet chips in there as well!
After reading the measurements again, I weighed the chocolate chips rather than use a whole cup.So my cookies are as filled and there's more cookie dough. Don't forget, if you are not chopping up premium chocolate but using chips, it's a whole cup. Either way....wow!
A note on the chunks: these cookies are very good made with store-bought chocolate chips, but are stupendous made with hand-chopped excellent quality chocolate....according to Dorie Greenspan.
INGREDIENTS:
1/2 cup all-purpose flour
1/4 cup unsweetened cocoa powder
1/2 tsp salt
1/4 tsp baking powder
3 Tsp unsalted butter, cut into 3 pieces
6 oz bittersweet chocolate, coarsely chopped
1 oz unsweetened chocolate, coarsely chopped
2 large eggs, room temperature
2/3 cup sugar
1 tsp pure vanilla extract
6 oz semisweet chocolate, chopped into chunks, or 1 cup store bought chocolate chips or chunks
6 oz premium quality milk or white chocolate, chopped into chunks, or 1 cup store-bought chocolate chips or chunks
1 1/2 cups coarsely chopped nuts, preferably salted peanuts or toasted pecans
1 cup moist, plump raisins (dark or golden) or finely chopped moist, plump dried apricots
I used my favorite Sun Maid Mixed plump raisins for this recipe. I love using these. They are so big and plump and really add to any recipe that requires raisins.
BEFORE YOU BEGIN: Center a rack in the oven and preheat oven to 350 degrees F. Please do NOT forget..if your pan is dark or nonstick...make it 325 degrees! This does and will affect the cookies. The bottoms will burn before the cookie is finished. Line two baking sheets with parchment or silicone mats (I love mine).
- Sift together flour, cocoa, salt and baking powder.
- Set a heatproof bowl over saucepan of simmering water. Add the butter, bittersweet chocolate and unsweetened chocolate and heat, stirring occasionally, just until melted - the chocolate and butter should be smooth and shiny but not so hot that the butter separates. Remove the bowl from the heat and set it aside to cool.
- Working with a stand mixer, preferably fitted with a paddle attachment, or with a hand mixer in a large bowl, beat the eggs and sugar together on medium-high speed for about 2 minutes, until they are pale and foamy.
- Beat in vanilla extract, then scrape down the bowl.
- Reduce the mixer speed to low and add the melted butter and chocolate, mixing only until incorporated.
- With rubber spatula, scrape down the bowl, then on low speed, add the dry ingredients. Mix just until the dry ingredients disappear into the dough, which will be thick, smooth and shiny.
- Scrape down the bowl and, using the rubber spatula, mix in the semi-sweet and milk(or white) chocolate chunks, nuts and raisins - you'll have more crunchies than dough at this point. (The dough can be wrapped in plastic and kept refrigerated for up to 3 days.)
- Drop the dough by generous heaping tablespoonfuls onto the baking sheets, leaving about an inch of space between them
- Bake the cookies one sheet at a time for 10 or 12 minutes. The tops of the cookies will appear dry but the interiors should still be soft. Remove the baking sheet and carefully, using a broad metal spatula, lift the cookies onto a cooling rack to cool to room temperature.
- Repeat with remaining dough, baking only one sheet at a time and making sure to cool the baking sheets between batches.
- If, when the cookies are cooled, the chocolate is still gooey and you'd like it to be a bit firmer, just pop the cookies into the fridge for about 10 minutes.
Friday, August 12, 2011
Secret Ingredient Chocolate Chip Cookies
First of these were wonderful!!! I have a few hours a day to spend with my daughter while my son is at summer camp and I wanted to find something that she may enjoy making with me.
I ordered a book by Cindy Mushet of Sur la Table named "Baking Kids Love". I think we will be pulling some more of her recipes out as we approach the holidays for some new family traditions.
Something else you should know...this makes a lot! When it says you need 2 large bowls, you need 1 XLarge bowl to dump it all into. If you have 1 large and one x-large for the dry you are set. It took a bowl the size of the metal bowl of my KitchenAid stand mixer.
A tip I wish I'd read ahead of time: You can bake some of the cookies today, and freeze the rest of the dough balls for another day. Put the balls close together on a pan and freeze for 30 mintues, or until hard. Transfer teh frozen balls to a resealable plastic freezer bag, and freeze for up to 3 months. To bake, take out as many cookies as you need, and space them on parchment-lined baking sheets. Let them thaw for 15 minutes, then press down on them to flatten slightly, and bake as directed.
INGREDIENTS
- 1 cup (2 sticks) unsalted butter, softened
- 4 large eggs, at room temperature
- 1 Tbs pure vanilla extract
- 1 cup canola or corn oil
- 4 cups unbleached all-purpose flour
- 2 cups sugar
- 2 cups tightly packed light brown sugar
- 2 1/4 cups old-fashioned rolled oats or quick oats (NOT instant)
- 2 tsp salt
- 2 tsp baking soda
- 2 1/2 cups Kellogg's Corn Flakes (for best results, stick to this brand)
- 1 (12 oz) bag miniature semisweet chocolate chips
Before you begin:
Postition 1 oven rack in the top 1/3 of the oven and 1 oven rack in the bottom 1/3 of the oven, and preheat the oven to 350 degrees F. Line the baking sheets with parchment paper.
Mix the dough:
Put the butter, eggs, and vanilla in a large bowl or x-large bowl & stir with wooden spoon until blended. Add the oil and beat well until combined. It will look like a mess, but that's okay.
Put flour, sugar, brown sugar, oats, salt and baking soda in another large bowl and whisk until blended. Add the dry ingredients to the butter mixture and stir well with a spoon. You can even use your hands to squish all the ingredients together. Sometimes your hands are the best tools.
Put corn flakes into a gallon size resealable plastic bag, squeeze out the air, and seal the top. Squeeze the bag until the flakes are broken into tiny pieces (do not use a food processor, it grinds the flakes too small). Add the crushed flakes and the chocolate chps to the dough and stir until evenly blended.
Shape the cookies:
Use a large (3 Tbs) or small 1 Tbs ice-cream scoop to shape the dough into cookies. You can also shape the dough by measuring out level tablespoons - 3 for each big cookie, 1 for each smaller cookie-- and then roll the dough between your palms into balls.
If you are making large cookies, bake only 6 at a time on each baking sheet, spacing the balls about 4 inches apart. These cookies spread when they bake. If you are making the smaller cookies, you can fit 12 cookies on each pan. Press down on each ball with your palm to flatten slightly.
Bake the cookies:
Place 1 baking sheet on each oven rack. Bake the large cookies for 7 minutes or the smaller cookies for 6 minutes. Using the oven mitts, switch the pans between the oven racks. Bake until light golden brown, another 7 to 8 minutes for large cookies, or 6 to 7 for smaller cookies.
Transfer the pans to the cooling racks and let the cookies cool completely. You may need to reuse the pans to finish baking all of the cookies. Let the pans cool before you put more dough on them for baking. Store the cookies in an airtight container or resealable plastic bag for up to 1 week.
Tuesday, July 26, 2011
Homemade Oreos
I found a great little recipe on The Cupcake Project blog for making homemade Oreos and couldn't resist! I mean...who doesn't love Oreos? I've made these twice now and my husband and kids will not let me give these out or share outside of our house! I'm not one for super sweet frosting/filling and so these were great.
There are other recipes that require rolling into a log and chilling. Honestly, I don't have the patience for that. When I get excited about making something, I want it now! So this recipe satisfied my quirk and my family's sweet tooth.
My first question when making these is….Hershey's or Nestle? Nestle was sitting in the front of my cabinet so that's what I chose. The batter came together easily in my stand mixer and absolutely no effort at all. The effort lay in the pressing out of the cookies and cutting them into perfect circles with the cookie cutters. This is where my 2nd SET of questions came….how big of a scoop? How big of a circle/cutter? Will the cookies flatten as they bake? Will they spread? So my first batch was created with a standard cookie dough scoop and pressed until just over the size of the 2" cutter.
6 minutes into the cooking…YES they are spreading…oops…so that's how she got approximately 40 cookies…I was over half way through the dough at 16 halves! So the 2" cookie cutter circles turned out to be 3" baked.
Time to choose a smaller cutter and less cookie dough. I will give the small end of a melon ball scoop and the 1.5" cookie cutter a shot. Woo hoo! That's the winning combination: small end of melon scoop and 1.5" cookie cutter. If you want thicker cookies...use the larger end.On to the frosting/stuffing. I used butter flavored shortening the first time…because that's all I happened to have in my cupboards. It definitely made it yellowy and not white. If you must have white, stick with regular ol' shortening and clear vanilla extract. I also, however, chose to use my favorite staple, vanilla bean paste instead of extract which caused it to go darker as well, but I choose flavor over looks any day!
The Chocolate Wafers
Makes about 20 stuffed cookies or 40 halves
- 1 1/4 C all-purpose flour
- 1/2 C unsweetened cocoa (I used Hershey's Special Dark)
- 1 t baking soda
- 1/4 t baking powder
- 1/4 t salt
- 1 C sugar
- 1/2 C plus 2 T butter, room temperature
- 1 large egg
- In a medium-sized bowl, mix the flour, cocoa, baking soda and powder, salt, and sugar.
- Beat in the butter and the egg. Continue mixing until dough comes together in a mass.
- Take rounded teaspoons of batter and place on a parchment paper-lined baking sheet approximately 2 inches apart. With moistened hands, slightly flatten the dough. (I found that while the dough wasn't sticky enough to roll, I could press it flat with my hands like the recipe said and then use cookie cutters to cut perfect circles. If you just care about the taste, then there is no need for the cookie cutters. Also, remember this is a chance to get creative and use all kinds of cookie cutters.)
- Bake for 9 minutes at 375 F. Set on a rack to cool.
The Filling
- 1/4 cup room-temperature, unsalted butter
- 1/4 cup vegetable shortening (1st batch I used butter flavored for more depth of flavor)
- 2 cups sifted powdered sugar
- Place butter and shortening in a mixing bowl, and at low speed, gradually beat in the sugar and vanilla.
- Turn the mixer on high and beat for 2-3 minutes until filling is light and fluffy.
- To make a cookie, pipe teaspoon-sized blobs of cream into the center of a cookie using a pastry bag with a 1/2 inch round tip. (If you don't have a pastry bag, you could easily just spread the filling with a knife or use a Ziploc with the corner cut off as a pastry bag. I had a pastry bag, but I only had a star tip. The tip doesn't matter much.)
- Place another cookie, equal in size to the first, on top of the cream. Lightly press, to work the filling evenly to the outsides of the cookie. Continue this process until all the cookies have been sandwiched with cream.
Subscribe to:
Posts (Atom)