Pages

Showing posts with label chocolate. Show all posts

Monday, November 28, 2011

Black Forest Cookies

Yield: 24 cookies

Big NOTE!: These are rich but so good. Great for this holiday season. Also PLEASE remember to lower the temperature of the oven by 25 degrees if you are using a non-stick dark pan!!!! The bottoms will burn by the time the rest of the cookie bakes if you don't. These are yummy and worth the overnight or 6 hour wait for the dough to cool!
INGREDIENTS
3/4 cup all-purpose flour
1 tsp baking powder
1/2 tsp salt
16 oz dark chocolate (60-72% cacao), coarsely chopped
10 Tbsp unsalted butter, cut into 1" pieces
6 large eggs
1 1/4 cups granulated sugar
1 cup firmly packed light brown sugar
1 Tbsp pure vanilla extract
1 cup (6 oz) semisweet chocolate chips
1 cup (6 oz) white chocolate chips
1 cup (6 oz) dried cherries

Sift the flour, baking powder, and salt together into a medium bowl & set aside.

In a large nonreactive metal bowl, combine the dark chocolate and butter. Set the bowl over a saucepan of simmering water and cook, stirring with a rubber spatula, until the chocolate and butter are completely melted and the mixture is smooth. Set aside to cool.

In the bowl of an electric mixer fitted with the whisk attachment, beat the eggs and sugars on high speed until the mixture is pale and thick, about 5 minutes.

Add the cooled chocolate mixture and the vanilla and beat until just combined. Scrape down the bowl and beat again for 10 seconds.

Add the flour mixture and mix on low until just combined, about 10 seconds. Do not over mix.

Using a spatula or wooden spoon, fold in the chocolate chips, white chocolate chips, and dried cherries. The dough will look very loose, but it will harden in the refrigerator. Refrigerate for 6 hours or overnight.

Preheat the oven to 375 degrees F (or 350 degrees F if using dark or nonstick pans). Line two baking sheets with parchment paper.

Drop the dough by rounded tablespoons onto the prepared baking sheets, about 1 inch apart. Bake for 10-12 minutes, rotating the pans halfway through the baking time, until the tops of the cookies are set and begin to show a few cracks. Remove from the oven and let cool slightly before removing from the pans and serving.

The cookies can be stored in an airtight container for up to 3 days.

Thursday, September 8, 2011

Sweet & Salty Cake - the good, the bad, and the ugly

Well, this cake definitely had it's good, bad and ugly. By the time I was finished, I had an hour and a half to get a bit of sleep before the new day began. I really wanted a reason to try out this recipe that I found in "Baked: New Frontiers in Baking". The recipe sounded so interesting and with a lot of depth. I love caramel and with homemade salted caramel....how could it go wrong!? By the time I was finished I made 4 batches of homemade caramel and purchased a new medium sized covered pot! (I've been looking for an excuse to replace my pots I've, so I wasn't too heart broken!)
THE GOOD:
Wow, the accolades I received on this little bugger! This cake would make fantastic cupcakes by the way! I've never had such a response. This made all of the "downs" of this cake in making it for the first time worth it! Not so sure about the lack of sleep....but I think so!

This was the most level baking cake I've ever seen! I'm not sure if it's because of the new cake pans or if it was the recipe. I'll have to make cupcakes to test this. I was shocked when I checked on them and realized I didn't need to use my cake leveler. This perfection also lead to a "down" side of the cake...if that's really what you want to consider it. The down-side of this can be remedied though. I'll cover that in a bit.
Another point for the good is that it was easy to make outside of my learning curve and hopefully I can give enough tips that you will avoid some mishaps. If you expect out of the box easy...this cake is not for you. It does require you to make the cake, the filling and the frosting, but there are not any crazy tedious steps to the cake. I'll try my best to remember to give all of the hints in the instructions.

THE BAD:
Recipe called for dark amber
...looks dark to me...but it was burnt!
First...trying to find fleur de sel in Greenland, NH is next to impossible! Maybe in a typical city you can find it. I settled for another French sea salt that our local kitchen store sold and it worked out just fine...apparently everyone was happy with the resulting tastes! You can't use your typical Morton's sea salt so be prepared to find gourmet! If you live in an area like mine and can't find Fleur de Sel, either find another French subsititute or order online!

If you are experienced with your stovetop and making caramel, this will not be a downside for you. It was my first attempt so it took 3 times to get it right. But not only do you have to make it for the layers, you need to make caramel for the chocolate ganache frosting as well. Three times to learn was a charm for me. Good side...no expensive ingredients were lost and I learned that my caramel will continue to cook a tad after it's removed from the heat.....oh, and a new pot came of this too! Ha!

The bad side to the level cakes...I didn't use a leveler and therefore the layers still had the crust/shiny layer on the cake did not peel off much at all. I thought it was a good thing...help keep the moisture in. Well, the caramel was supposed to soak into the cake and with the first layer it didn't. I added a dam around the circumference to prevent leakage of caramel but that didnt' stop it from leaking out. I added more than the 1/4 cup to soak, which lent to the leaking as well. To prevent this leakage...1st remove the shiny top coating of the cake or a good portion of it. Second...use only 1/4 of a cup of caramel. Plan ahead and make room in your freezer for a quick setting of the cake and frosting for layering as well.

THE UGLY:
Well, my top photo speaks for itself! I think that if it's humid, this cake is best made into cupcakes or some other form of decorating. I was going for the smooth look and it just didn't work out. I couldn't use various techniques to smooth as I have had problems with the book's frostings not thickening enough. So here are 2 tips: 
  1. BEAT BEAT BEAT AND BEAT SOME MORE: When you think you've done enough and stop to see just how sloppy it is....beat it some more. This is where the stand mixer earns it's keep in my kitchen. It took beating for 15 minutes or more.
  2. THE FREEZER IS YOUR FRIEND: By placing the cake in the freezer for 5-10 minutes, it will add a nice cold surface for your crumb coat. The crumb coat is a great way to work out the smoothness of your cake. Just add thin first coat to your cake and get as smooth as possible. Stick in the freezer for 5-10 minutes, add your final coat to your cake and the frosting will just grab and stick as the cold crumb coat make the butter harden a bit. To further smooth out if it gets too hard to fast...Run your frosting knife under warm/hot water and throughly dry then run it over the frosting. It will smooth right out. I didn't do this step as it was 4:30 in the morning at this point and I just wanted to finish!
The ugly...well, I didn't take any photos of my trash can after pouring out the burnt sugar. I believe we have finially removed the rest of the escaped caramel at the bottom. It burnt it's way through the plastic garbage bag...of course....I knew it would...but at the time, just didn't care...and down the sides of the trash can...which acted like glue and glued the bag to the trash can, which made double bagging a must. Not very green of me huh? :)

Ok, enough babbling, ranting and raving, and on with the recipe!
INGREDIENTS:
For the Classic Chocolate Cake Layers
3/4 cup dark unsweetened cocoa powder
1 1/4 cups hot water
2/3 cup sour cream
2 2/3 cups all-purpose flour
2 tsp baking powder
1 tsp baking soda
1/2 tsp salt
3/4 cup (1 1/2 sticks) unsalted butter, softened
1/2 cup vegetable shortening
1 1/2 cups granulated sugar
1 cup firmly packed dark brown sugar
3 large eggs, at room temperature
1 Tbs pure vanilla extract

For the Salted Caramel
1/2 cup heavy cream
1 tsp fleur de sel
1 cup sugar
2 Tbs light corn syrup
1/4 cup sour cream

For the Whipped Caramel Ganache Frosting
1 lb dark chocolate (60-70% cacao), chopped
1 1/2 cups heavy cream
1 cup sugar
2 Tbs light corn syrup
2 cups (4 sticks) unsalted butter, soft but cool, cut into 1/2-inch pieces

To assemble the Cake
2 tsp fleur de sel, plus more for garnish

TO MAKE THE CLASSIC CHOCOLATE CAKE LAYERS
Preheat oven to 325 degrees F. Butter three 8-inch round cake pans, line the bottoms with parchment paper, and butter the parchment. Dust with flour, and knock out the excess flour.

In a medium bowl, combine the cocoa powder, hot water, and sour cream and set aside.

Sift the flour, baking powder, baking soda, and salt together in a medium bowl and set aside.

In the bowlof an electric mixer fitted with a paddle attachment, beat the butter and shortening on medium speed until ribbonlike, about 5 minutes. Add the sugars and beat until light & fluffy, about 5 minutes. Add the eggs, one at a time, beating well after each addition, then add the vanilla and beat until incoroporated. Scrape down the bowl and mix again for 30 seconds.

Add the flour mixture, alternating with the cocoa mixture, in 3 additions, beginning and ending with the flour mixture.

Divide the batter among the prepared pans and smooth the tops. Bake for 35 to 40 minutes, rotating the pans halfway through the baking time, until a toothpick inserted in the center comes out clean. Transfer the cakes to a wire rack and let cool for 20 minutes. Invert the cakes onto the rack, remove the pans, and let cool completely. Remove the parchment.

MAKE THE SALTED CARAMEL
In a small saucepan, combine the cream and fleur de sel. Bring to a simmer over very low heat until the salt is dissolved.

Meanwhile, keeping a close eye on the cream mixture so it doesn't burn, in a medium saucepan combine 1/4 cup water, the sugar, and the corn syrup, stirring the together carefully so you don't splash the sides of the pan. Cook over high heat until an instant-read thermometer reads 350 degrees F, or until the mixture is a dark amber in color, 6-8 minutes. This is where I burnt mine twice. It burnt right after it read 350 degrees and was the right color. It seemed to continue to cook after being removed. I learned to remove this right before the 350 mark and just before it was the perfect color.  Remove from heat and let cool for 1 minute.

Add the cream mixture to the sugar mixture (NOTE: this is reactive! Drizzle the cream down the side of the pan slowly). Whisk in the sour cream. Let the caramel cool to room temperature, then transfer to an airtight container & refrigerate until you are ready to assemble the cake.


MAKE THE WHIPPED CARAMEL GANACHE FROSTING
Put the chocolate in a large heatproof bowl & set aside.

In a small saucepan, bring the cream to a simmer over very low heat.
Meanwhile, keeping a close eye on the cream mixture so it doesn't burn, in a medium saucepan combine 1/4 cup water, the sugar, and the corn syrup, stirring the together carefully so you don't splash the sides of the pan. Cook over high heat until an instant-read thermometer reads 350 degrees F, or until the mixture is a dark amber in color, 6-8 minutes. Remove from heat & let caramel cool for one minute.
Add the cream to the caramel and stir to combine (NOTE: this is reactive! Drizzle the cream down the side of the pan slowly). Let the caramel and chocolate sit for 1 minute, then, starting in the center of the bowl, and working your way out to the edges, slowly stir the chocolate and caramel mixture in a circle until the chocolate is completely melted. Let the mixture cool, then transfer it to the bowl of an electric mixer fitted with a paddle attachment.
Mix on low until the bowl feels cool to the touch. Increase the speed to medium-high and gradually add the butter, beating until thoroughly incorporated. Scrape down the bowl and beat on high speed until the mixgture is fluffy.

ASSEMBLE THE CAKE
Place one cake layer on a serving platter, spread 1/4 cup of the caramel over the top (I wouldn't add more than the 1/4 cup or it may be too much and ooze out AND I would make sure to remove some of the crusty coating so that the caramel will absorb better)....(I piped a dam around the circumference of the cake first to help prevent leaking of caramel out the sides). Let the caramel soak into the cake, then spread 3/4 cup of the ganache frosting over the caramel. Sprinkle 1 tsp of the fleur de sel over the frosting. then top with the second cake layer. Spread with caramel frosting & sprinkle with 1 tsp of the fleur de sel. Then top with the third layer. Spread with caramel. Crumb coat the cake and put theh cake in the refrigerator for 15 minutes (5-10 in freezer) to firm up the frosting. Frost the sides and top with the remaining frosting. Garnish with a sprinkle of fleur de sel.

This cake will keep beautifully in a cake server at room temperature (cool and humidity free) for up to 3 days. If your room is not cool, place the cake in a cake server and refrigerate for up to 3 days. Remove the cake from the refrigerator and let it sit at room temperature for at least 2 hours before serving.

Sunday, August 21, 2011

Easy Peanut Butter Cake...Oreo...truffles


INGREDIENTS
1 package Oreo peanut butter cookies...use the whole cookie including cream
1 4 oz package cream cheese (softened)
4 oz peanut butter (I used Peter Pan Honey Peanut Butter)
Finely crush cookies in a food processor or place them in a Ziploc bag and crush them into a fine consistency.

Combined in processor & formed ball
Cream softened cream cheese and peanut butter together.

Stir in cream cheese mixture or add to the food processor to blend until the mixture forms a ball and will hold it's shape when rolled.

If not using a food processor, use the back of a large spoon to help mash the two together.


Roll the mixture into 1" balls and place on wax paper covered cookie sheet. Cover with cellophane.

Place in freezer for 5 minutes ONLY for a fast cooling (do NOT freeze). Afterwards move into refrigerator. Remove only a few balls at a time to work with while keeping the others chilled.

Melt chocolate as directed on the package and then dip balls into chocolate. Tap off extra and set aside on wax paper covered cookie sheet to dry. You can sprinkle tops or drizzle them with the toppings of your choice. A peanut butter chip or broken up peanut butter cup would be great.

Sunday, August 14, 2011

Chocolate Chunkers - Caution: cookies taste yummier than they appear!

Another Dorie Greenspan recipe I had to try. Her description of these were "truly fabulous". Though these look kind of ho hum they are far from. In my photos you can only see the white chocolate chips and maybe a peanut here and there, there is also mixed plump raisins, semi sweet chips in there as well!

After reading the measurements again, I weighed the chocolate chips rather than use a whole cup.So my cookies are as filled and there's more cookie dough.  Don't forget, if you are not chopping up premium chocolate but using chips, it's a whole cup. Either way....wow!


A note on the chunks: these cookies are very good made with store-bought chocolate chips, but are stupendous made with hand-chopped excellent quality chocolate....according to Dorie Greenspan.

INGREDIENTS:
1/2 cup all-purpose flour
1/4 cup unsweetened cocoa powder
1/2 tsp salt
1/4 tsp baking powder
3 Tsp unsalted butter, cut into 3 pieces
6 oz bittersweet chocolate, coarsely chopped
1 oz unsweetened chocolate, coarsely chopped
2 large eggs, room temperature
2/3 cup sugar
1 tsp pure vanilla extract
6 oz semisweet chocolate, chopped into chunks, or 1 cup store bought chocolate chips or chunks
6 oz premium quality milk or white chocolate, chopped into chunks, or 1 cup store-bought chocolate chips or chunks
1 1/2 cups coarsely chopped nuts, preferably salted peanuts or toasted pecans
1 cup moist, plump raisins (dark or golden) or finely chopped moist, plump dried apricots

I used my favorite Sun Maid Mixed plump raisins for this recipe. I love using these. They are so big and plump and really add to any recipe that requires raisins.

BEFORE YOU BEGIN: Center a rack in the oven and preheat oven to 350 degrees F. Please do NOT forget..if your pan is dark or nonstick...make it 325 degrees! This does and will affect the cookies. The bottoms will burn before the cookie is finished. Line two baking sheets with parchment or silicone mats (I love mine).
  1. Sift together flour, cocoa, salt and baking powder.
  2. Set a heatproof bowl over saucepan of simmering water. Add the butter, bittersweet chocolate and unsweetened chocolate and heat, stirring occasionally, just until melted - the chocolate and butter should be smooth and shiny but not so hot that the butter separates. Remove the bowl from the heat and set it aside to cool.
  3. Working with a stand mixer, preferably fitted with a paddle attachment, or with a hand mixer in a large bowl, beat the eggs and sugar together on medium-high speed for about 2 minutes, until they are pale and foamy.
  4. Beat in vanilla extract, then scrape down the bowl.
  5. Reduce the mixer speed to low and add the melted butter and chocolate, mixing only until incorporated.
  6. With rubber spatula, scrape down the bowl, then on low speed, add the dry ingredients. Mix just until the dry ingredients disappear into the dough, which will be thick, smooth and shiny.
  7. Scrape down the bowl and, using the rubber spatula, mix in the semi-sweet and milk(or white) chocolate chunks, nuts and raisins - you'll have more crunchies than dough at this point. (The dough can be wrapped in plastic and kept refrigerated for up to 3 days.)
  8. Drop the dough by generous heaping tablespoonfuls onto the baking sheets, leaving about an inch of space between them
  9. Bake the cookies one sheet at a time for 10 or 12 minutes. The tops of the cookies will appear dry but the interiors should still be soft. Remove the baking sheet and carefully, using a broad metal spatula, lift the cookies onto a cooling rack to cool to room temperature.
  10. Repeat with remaining dough, baking only one sheet at a time and making sure to cool the baking sheets between batches.
  11. If, when the cookies are cooled, the chocolate is still gooey and you'd like it to be a bit firmer, just pop the cookies into the fridge for about 10 minutes.


Wednesday, August 10, 2011

Grasshopper Cupcakes

 
Looking through my new Baked cookbook I found a recipe for Grasshopper cake. They had taken the old grasshopper pie of the 1950s laden with alcohol and created a 3 layer 8-inch cake. I decided to use 2/3 of the batter for x-large cupcakes and the remainder for cakeballs. Let's see how it all turns out. The cupcakes ended up like Girl Scout cookie Thin Mints on steriods!

The chocolate cake recipe in this is just spectacular! I wouldn't change a thing and it will probably be my go to chocolate cake for many things. The chocolate mint mousse filling was easy to make and make the huge cupcakes, not quite so heavy. The chocolate mint ganache added a suprise between the cupcake and frosting. And the frosting...whipped creme de menthe buttercream (whipped, not heavy at all). The frosting had me very worried. It was runny and instructios said to refrigerate to firm up and so I left it overnight. The following evening I rewhipped it with my stand mixer to see it looking "curdled". I panicked, but looked up buttercream issues and found that until warmed up a bit, it wouldn't whip and would separate at first, but keep the blender going and sure enough....a thing a beauty about 10-15 mintues later.

FOR THE CLASSIC CHOCOLATE CAKE
Yields approximately 18 xlg cupcakes/36 regular cupcakes/3 8" round layers
3/4 cup dark unsweetened cocoa powder (I used Hershey's Special Dark)
1 1/4 cup hot water
2/3 cup sour cream
2 2/3 cups all-purpose flour
2 tsp baking powder
1 tsp baking soda
1/2 tsp salt
3/4 cup (1 1/2 sticks) unsalted butter, softened
1/2 cup vegetable shortening
1 1/2 cups granulated sugar
1 cup firmly packed dark brown sugar
3 large eggs, room temperature
1 Tbs pure vanilla extract (I used vanilla bean paste)

Instructions
  1. Preheat oven to 325 degrees F. Butter three 8-inch round cake pans or line cupcake pans. Line the bottoms of cake pans with parchment paper, and butter the parchment. Dust with flour, and knock out the excess flour.
  2. In a medium bowl, combine the cocoa powder, hot water, and sour cream and set aside to cool.
  3. Sift the flour, baking powder, baking soda, and salt together into a medium bowl and set aside.
  4. In the bowl of an electric mixer fitted with the paddle attachements, beat the butter & shortening on medium speed until light & fluffy & ribbon-like, about 5 minutes. Add the sugars and beat until light, about 5 minutes. Add the eggs, one at a time, beating well after each addition, then add the vanilla and beat until incorporated. Scrape down the bowl and mix again for 30 seconds.
  5. Add the flour mixture, alternating with the cocoa mixture, in three additions, beginning and ending with the flour mixture.
  6. For the cake pans:  Divide the batter among the pans and smooth the tops. Bake for 35-40 minutes, rotating the pans halfway through the baking time, until a toothpick inserted in the cneter of each cake comes out clean. Transfer the cakes to a wire rack and let cool for 20 minutes. Invert the cakes onto the rack, remove the pans, and let cool completely. Remove the parchment.
  7. For the x-large cupcakes: cook for about 20-25 minutes
  8. For regular size cupcakes: start with 15 and add as needed. I didn't make these so it's a guessing game.


I changed a white chocolate mousse recipe I found on The Food Network to dark chocolate for the filling of the cupcakes.

MINT CHOCOLATE MOUSSE:
  • 9 ounces dark chocolate, broken into small pieces
  • 1 cup heavy
  • 1 egg white
  • 1/4 teaspoon peppermint extract
  • 1 Tbs creme de menthe 

  1. Put the pieces of chocolate in a bowl, and sit this bowl over a pan over simmering water until it melts, stirring gently with a spatula every now and then. When it's melted, stand the bowl on a cold surface to cool down a little.
  2. In another bowl, and using an electric handheld whisk for ease, whip the cream, egg white and extract together. You want soft peaking rather than a stiff mixture.
  3. Put a big dollop of cream onto the slightly cooled chocolate and mix, and then gently fold the chocolate mixture into the cream.
FOR THE CREME DE MENTHE BUTTERCREAM
  • 2 1/4 cups sugar
  • 1/2 cup all-purpose flour
  • 2 1/4 cups milk
  • 1/2 cup heavy cream
  • 4 1/2 sticks unsalted butter, soft but cool, cut into small pieces
  • 2 Tbs creme de menthe
  • Now That's a lot of butter!
  • 2 1/4 tsp peppermint extract
Instructions for the buttercream:
  1. In a medium heavy-bottomed saucepan, whisk the sugar & flour together. Add milk & cream and cook over medium heat, whisking occasionally, until the mixture comes to a boil and has thickened.
  2. Transfer the mixture to the bowl of an electric mixer fitted with the paddle attachment. Beat on high speed until cool. Reduce the speed to low and add the butter; mix until thoroughly incorporated. Increase the speed to medium-high and beat until the frosting is light and fluffy.
  3. Add the creme de menthe & peppermint extract and mix until combined. If the frosting is too soft, put it in the refrigerator to chill slightly, then mix again until it is the proper consistency. If the frosting is too firm, set the bowl over a pot of simmering water, then mix again.
  4. Leave the buttercream at room temperature while you make the ganache.
WAY EASY GANACHE
  • 2 cups chocolate chips
  • 1 cup heavy cream
  • 1-4 Tbs butter (adds shine to the ganache, I used 4)
  • sugar (as much as you like. I added just 2 Tbs)
  • 1 tsp extract of your choice (vanilla was called for) I used peppermint
Directions
  1. Dump the chips and butter into a food processor.
  2. Bring the cream and sugar to a boil.
  3. Don't burn it!
  4. Dump cream mixture into chips, turn processor on.
  5. Once it's mixed, cover and stick in fridge until the mix is the right texture for frosting.
  6. Ganache layer before frosting
  7. If you're in a hurry, put some ice cubes in a big bowl, and the chocolate mix in a smaller bowl.
  8. Place the bowl with chocolate into the larger bowl on top of the icecubes (No! Don't put the cubes into the chocolate mix!) Stir and the mixture will thicken as it cools.
  9. Perfect and yummy.
  10. Don't work it too much or it loses its shine-- though it's always delicious.
  11. I imagine a blender will work-- you might have to add more cream to supply more liquid. I haven't tried.
  12. Add vanilla or, for a more grown-up taste, substitute a tablespoon of Kalua or Grand Marnier, etc.

Tuesday, August 2, 2011

Banana Chocolate Chip Muffins on a Caffeine Buzz

So what do you get when you have 4-5 over ripe bananas, one last fresh farm egg that needs to be used, little time or energy after getting the kids a bath, dinner and ready for bed? You get these marvelous muffins! Dense, moist and packed full of flavor. You can taste every bit of the banana, chocolate, and yes, the hint of coffee/espresso. And even better, they were super easy to make!

I just received a highly recommended book in the mail yesterday, Baked: New Frontiers in Baking, by Matt Lewis & Renato Poliafito. I couldn't wait to give a try and was thinking maybe this weekend, but the bananas sent me searching for something quick and easy, but I didn't want just another banana bread. Although their Banana Pecan Piloncillo Ice Cream sounded just wonderful, sorry guys, I don't just have piloncillo sitting around...and what is piloncillo anyway?! Guess I'll have to find out!

OK, enough jabbering, here's the recipe:
INGREDIENTS  (yield 12 muffins) ( I made 18)
1 1/2 cups mashed, very ripe bananas (about 4 medium) (I used 5)
1/2 cup sugar
1/4 cup firmly packed brown sugar
1/2 cup (1 stick) unsalted butter, melted
1/4 cup whole milk
1 large egg
1 1/2 cups all-purpose flour
1 tsp instant espresso powder (NOT ground) (I used 2 tsp of instant coffee)
1 1/2 tsp baking soda
1 tsp salt
1 cup (6 oz) semisweet chocolate chips (I used Ghiradelli mini chips>

Preheat oven to 350 degrees F. Spray a 12 cup muffin pan with nonstick cooking spray.

In a medium bowl, stir together the bananas, sugars, butter, milk, and egg.


In another medium bowl, whisk together the flour, instant espresso powder, baking soda, and salt. Make a well in the middle of the dry ingredients. Pour the wet ingredients into the well and stir until just combined. Fold in the chocolate chips. 

Fill each cup about 3/4 full. (These barely rise) Bake in the center of the oven for 20-25 minutes, until toothpick inserted in center of a muffin comes out clean.

Move the muffin pan to a cooling rack, and let cool for 15 minutes. After 15 minutes, remove the muffins from the pan and let them finish cooling on the cooling rack.

Muffins can be stored in an airtight container for up to 2 days.

Go ahead! Give them a shot. They're great and a wonderful change from the ordinary.

(Note: Bananas that are over ripe, but you are not ready to bake with yet, may be frozen, then thawed when ready for use. So go ahead, save that one or two in your freezer and you may accumulate enough so that when you are ready, you'll have plenty to use!)


Tuesday, July 26, 2011

Homemade Oreos


I found a great little recipe on The Cupcake Project blog for making homemade Oreos and couldn't resist!  I mean...who doesn't love Oreos? I've made these twice now and my husband and kids will not let me give these out or share outside of our house! I'm not one for super sweet frosting/filling and so these were great.

There are other recipes that require rolling into a log and chilling. Honestly, I don't have the patience for that. When I get excited about making something, I want it now! So this recipe satisfied my quirk and my family's sweet tooth.


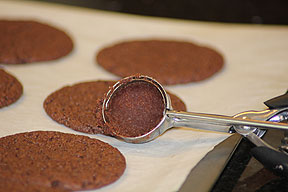
My first question when making these is….Hershey's or Nestle? Nestle was sitting in the front of my cabinet so that's what I chose. The batter came together easily in my stand mixer and absolutely no effort at all. The effort lay in the pressing out of the cookies and cutting them into perfect circles with the cookie cutters. This is where my 2nd SET of questions came….how big of a scoop? How big of a circle/cutter? Will the cookies flatten as they bake? Will they spread? So my first batch was created with a standard cookie dough scoop and pressed until just over the size of the 2" cutter.

6 minutes into the cooking…YES they are spreading…oops…so that's how she got approximately 40 cookies…I was over half way through the dough at 16 halves!  So the 2" cookie cutter circles turned out to be 3" baked.

Time to choose a smaller cutter and less cookie dough.  I will give the small end of a melon ball scoop and the 1.5" cookie cutter a shot. Woo hoo! That's the winning combination: small end of melon scoop and 1.5" cookie cutter. If you want thicker cookies...use the larger end.

On to the frosting/stuffing. I used butter flavored shortening the first time…because that's all I happened to have in my cupboards. It definitely made it yellowy and not white. If you must have white, stick with regular ol' shortening and clear vanilla extract. I also, however, chose to use my favorite staple, vanilla bean paste instead of extract which caused it to go darker as well, but I choose flavor over looks any day!

The Chocolate Wafers
Makes about 20 stuffed cookies or 40 halves
  • 1 1/4 C all-purpose flour
  • 1/2 C unsweetened cocoa (I used Hershey's Special Dark)
  • 1 t baking soda
  • 1/4 t baking powder
  • 1/4 t salt
  • 1 C sugar
  • 1/2 C plus 2 T butter, room temperature
  • 1 large egg
  1. In a medium-sized bowl, mix the flour, cocoa, baking soda and powder, salt, and sugar.
  2. Beat in the butter and the egg. Continue mixing until dough comes together in a mass.
  3. Take rounded teaspoons of batter and place on a parchment paper-lined baking sheet approximately 2 inches apart. With moistened hands, slightly flatten the dough. (I found that while the dough wasn't sticky enough to roll, I could press it flat with my hands like the recipe said and then use cookie cutters to cut perfect circles. If you just care about the taste, then there is no need for the cookie cutters. Also, remember this is a chance to get creative and use all kinds of cookie cutters.)
  4. Bake for 9 minutes at 375 F. Set on a rack to cool.
The Filling
  • 1/4 cup room-temperature, unsalted butter
  • 1/4 cup vegetable shortening (1st batch I used butter flavored for more depth of flavor)
  • 2 cups sifted powdered sugar
  • 2 teaspoons vanilla extract (I used vanilla bean paste instead.)
  1. Place butter and shortening in a mixing bowl, and at low speed, gradually beat in the sugar and vanilla.
  2. Turn the mixer on high and beat for 2-3 minutes until filling is light and fluffy.
  3. To make a cookie, pipe teaspoon-sized blobs of cream into the center of a cookie using a pastry bag with a 1/2 inch round tip. (If you don't have a pastry bag, you could easily just spread the filling with a knife or use a Ziploc with the corner cut off as a pastry bag. I had a pastry bag, but I only had a star tip. The tip doesn't matter much.)
  4. Place another cookie, equal in size to the first, on top of the cream. Lightly press, to work the filling evenly to the outsides of the cookie. Continue this process until all the cookies have been sandwiched with cream.